Chapter 1. Introduction
1.1. Overview
This article demonstrates how to create a Yocto BSP layer for a custom carrier board designed for a Variscite System on Module / Computer on Module. You will learn how to create a meta layer that compiles and installs a 'Hello, World!' application. Then, you will modify it to be a BSP layer by adding a machine configuration file.
The document is divided into three parts:
1. Preparing the environment to build Yocto:
2. Creating a new meta layer on top of Variscite Yocto BSP:
3. Creating a new meta layer and modify it to be a meta BSP layer with a machine configuration file:
1.2. Prerequisites
1.2.1. Variscite Hardware
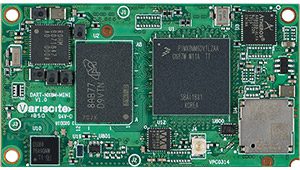
This document uses the Variscite DART-MX8M-MINI module as an example:
| DART-MX8M-MINI | Main Specifications |
 |
CPU: NXP i.MX 8M Mini For more information, visit Variscite’s DART-MX8M-MINI Software Wiki and Product Page |
1.2.2. Variscite Software
This document uses Variscite's Yocto Dunfell BSP as an example:
| Yocto Project | Information |
|
Yocto Dunfell 3.1 (Based on FSL Community BSP). Visit Variscite’s Software Wiki for a full guide on how to build Yocto from source code. |
🛈 The procedures below are compatible with all Variscite System on Modules.
1.3. Setting Up the Yocto Project Environment
1.3.1. Install the Required Packages
The following packages must be installed on the host machine (based on Ubuntu 20.04 64-bit, in this example):
1. Install the essential packages for Yocto to work on host machine:
$ apt install gawk wget git diffstat unzip texinfo gcc-multilib build-essential \
      chrpath socat cpio python python3 python3-pip python3-pexpect \
      xz-utils debianutils iputils-ping libsdl1.2-dev xterm tree
$ apt install autoconf libtool libglib2.0-dev libarchive-dev sed cvs subversion \
      coreutils texi2html docbook-utils python-pysqlite2 help2man make \
      gcc g++ desktop-file-utils libgl1-mesa-dev libglu1-mesa-dev \
      mercurial automake groff curl lzop asciidoc u-boot-tools dos2unix \
      mtd-utils pv libncurses5 libncurses5-dev libncursesw5-dev \
      libelf-dev zlib1g-dev bc rename
🛈 The apt package manager may need to use root privileges (sudo) to install the packages.
2. If git is not configured yet:
$ git config --global user.name "Your Name" ①
$ git config --global user.email "Your Email" ②
❶ Change "Your Name" to your name.
❷ Change "Your Email" to your email address.
1.3.2. Retrieve Repo Tool
1. To use Variscite's repo manifest the repo tool must be installed:
$ mkdir ~/bin ①
$ curl https://commondatastorage.googleapis.com/git-repo-downloads/repo > ~/bin/repo
$ chmod a+x ~/bin/repo
$ export PATH=~/bin:$PATH
❶ This step may not be needed if the bin folder already exists.
1.3.3. Retrieve Yocto Dunfell
1. Download the latest Dunfell manifest revision from Variscite:
$ mkdir ~/var-fslc-yocto
$ cd ~/var-fslc-yocto
$ repo init -u https://github.com/varigit/variscite-bsp-platform.git \
            -b dunfell -m default.xml
$ repo sync -j$(nproc) ①
❶ The repo sync step may take a while to finish
Chapter 2. Custom Yocto Meta Layer
The Yocto layers are repositories that contain related metadata (i.e. sets of instructions) that tell the Yocto build system how to build a target image. The Yocto Project’s layer model facilitates collaboration, sharing, customization and reuse within the Yocto Project development environment. Layers logically separate information for the project. For example, a layer can be used to hold all the configurations for a particular piece of hardware.
2.1. Create a New Layer
1. Set up the environment to create the new layer:
$ cd ~/var-fslc-yocto/
$ MACHINE=imx8mm-var-dart DISTRO=fslc-xwayland . setup-environment build ①
❶ The above command is only mandatory for the first-time build setup. Whenever restarting a newer build session, or using a different terminal, just run:
$ cd ~/var-fslc-yocto/
$ source setup-environment build
a. Create an environment variable for the sources directory:
$ export SDIR=~/var-fslc-yocto/sources/- This environment variable is only set for this shell and its child processes. If the shell/terminal is closed and starts a new one, this setting is not retained.
2. Use the bitbake-layers script to create and add a new layer on the sources directory:
$ cd ~/var-fslc-yocto/build
$ bitbake-layers create-layer ../sources/meta-<custom_layer>
$ bitbake-layers add-layer ../sources/meta-<custom_layer>
Replace <custom_layer> with your preferred name.
3. This script creates a minimal file structure for a new layer at the below path. This may be inspected using the tree command.
🗁 ~/var-fslc-yocto/sources/meta-<custom_layer>
Inspect the file structure using the tree command:
$ tree $(SDIR)/meta-<custom_layer>
├── COPYING.MIT
├── README
├── conf
│   └── layer.conf
└── recipes-example
    └── example
        └── example_0.1.bb
2.1.1. Create a Simple "Hello, World!" Example Recipe
1. Create a directory to host the application in the meta layer:
$ cd $SDIR/meta-<custom_layer>
$ mkdir -p recipes-<custom_recipe_dir>/hello-world/hello-world
Replace <custom_recipe_dir> with your preferred name.
2. Create the recipe (.bb file) for the application:
$ cd $SDIR/meta-<custom_layer>/recipes-<custom_recipe_dir>/hello-world/
$ touch hello-world_1.0.0.bb
Then, add the following instructions to the recipe:
📄 ~/var-fslc-yocto/sources/meta-<custom_layer>/recipes-<custom_recipe_dir>/hello-world/hello-world_1.0.0.bb
SUMMARY = "A simple Hello World application"
LICENSE = "MIT"
LIC_FILES_CHKSUM = "file://${COMMON_LICENSE_DIR}/MIT;md5=0835ade698e0bcf8506ecda2f7b4f302"
SRC_URI = "file://hello_world.c"

TARGET_CC_ARCH += "${LDFLAGS}"

S = "${WORKDIR}"

do_compile() {
  ${CC} -Wall hello-world.c -o hello-world
}

do_install() {
  install -d ${D}${bindir}
  install -m 0755 ${S}/hello-world ${D}${bindir}
}
3. Create a simple C programming language source file that prints "Hello, World!":
$ cd $SDIR/meta-<custom_layer>/recipes-<custom_recipe_dir>/hello-world/hello-world/
$ touch hello_world.c
Then, add the following source code to the file:
📄 ~/var-flsc-yocto/sources/meta-<custom_layer>/recipes-<custom_recipe>/hello-world/src/hello_world.c
#include <stdio.h>
#include <stdlib.h>
int main(void)
{
  printf("Hello, World!\n");
  return EXIT_SUCCESS;
}
4. Open the local.conf file:
📄 ~/var-fslc-yocto/build/conf/local.conf
Then, add the following line at the end of the file, to include the package in any image you will build next:
IMAGE_INSTALL_append = " hello-world"5. Build the core-image-base image (for example):
$ cd ~/var-fslc-yocto/build/
$ bitbake core-image-base ①
❶ This step may take several hours to complete depending on your computer’s specifications
The "Hello, World!" application will be installed to /usr/bin/hello-world, as defined in the do_install() function of the recipe above.
Chapter 3. Custom Yocto BSP Layer
The following example demonstrates how to create a custom BSP layer. The process is basically the same as with the meta layer created in the previous example. However, in a BSP meta layer, a machine configuration file for the custom board is included. The machine configuration file is used to configure the environment for the custom board. This generally involves changes in the Bootloader and Kernel.
3.1. Create a New Machine
1. Use the bitbake-layers script to create and add a new layer in the sources directory:
$ cd ~/var-fslc-yocto/build
$ bitbake-layers create-layer ../sources/meta-<custom_bsp>
$ bitbake-layers add-layer ../sources/meta-<custom_bsp>
Replace <custom_bsp> with your preferred name.
2. Create the machine configuration file using the imx8mm-var-dart.conf as its base:
$ mkdir -p $SDIR/meta-<custom_bsp>/conf/machine
$ cd $SDIR/meta-<custom_bsp>/conf/machine
$ touch imx8mm-var-dart-<custom_board>.conf
Replace <custom_board> with your preferred name.
The imx8mm-var-dart.conf configuration file that will be used as a base is located at:
📄 ~/var-fslc-yocto/sources/meta-variscite-fslc/conf/machine/imx8mm-var-dart.conf
Add the following content to the configuration file that was just created:
📄 ~/var-fslc-yocto/sources/meta-<custom_bsp>/conf/machine/imx8mm-var-dart-<custom_board>.conf
require conf/machine/imx8mm-var-dart.conf
MACHINEOVERRIDES_EXTENDER_imx8mm-var-dart-<custom_board> = "imx8mm-var-dart"
The resulted MACHINEOVERRIDES value will be:
MACHINEOVERRIDES="aarch64:imx:use-nxp-bsp:mx8:mx8m:imxdrm:imxvpu:imxgpu:imxgpu2d:imxgpu3d:mx8mm:imx8mm-var-dart:imx8mm-var-dart-<custom_board>"3. To use a new device tree (dtb) file, add the following line at the end of the imx8mm-var-dart-<custom_board>.conf file:
KERNEL_DEVICETREE = " freescale/imx8mm-var-dart-<custom_board>.dtb "Of course, you’ll need to also add the actual device tree source file (dts) to the kernel source tree. You can either adjust the kernel recipe to add your device tree source file as a patch or to use your own copy of the kernel repository with your changes. To adjust the kernel recipe, you can add a bbappend file to your own BSP layer that you just created. For example:
📄 ~/var-fslc-yocto/sources/meta-<custom_bsp>/recipes-kernel/linux/linux-variscite_%.bbappend
4. The file structure should look like this:
$ tree $SDIR/meta-<custom_bsp>
.
├── conf
│   ├── layer.conf
│   └── machine
│       └── imx8mm-var-dart-<custom_board>.conf
├── COPYING.MIT
├── README
└── recipes-example
    └── example
        └── example_0.1.bb
3.2. Build the Custom Image
1. Modify the MACHINE on the local configuration (local.conf) file:
📄 ~/var-fslc-yocto/build/conf/local.conf
a. Change imx8mm-var-dart:
MACHINE ??= 'imx8mm-var-dart'b. To imx8mm-var-dart-<custom_board>:
MACHINE ??= 'imx8mm-var-dart-<custom_board>'2. Run the bitbake command:
$ cd ~/var-fslc-yocto/build/
$ bitbake core-image-base ①
❶ This step may take several hours to complete depending on your computer’s specifications
This generates a .wic file for the custom board image:
📄 ~/var-fslc-yocto/build/tmp/deploy/images/imx8mm-var-dart-<custom_board>/core-image-base-imx8mm-vardart-<
custom_board>.wic
3.3. Flash the Custom Image to the SD Card
1. To flash the custom board image:
$ cd ~/var-fslc-yocto/build/tmp/deploy/images/imx8mm-var-dart-<custom_board>/
$ zcat core-image-base-imx8mm-var-dart-<custom_board>.wic.gz | sudo dd of=/dev/sdX bs=1M status=progress conv=fsync ①
❶ Make sure to use the correct path to the SD card instead of /dev/sdX (e.g., /dev/sdb). To check it, use the lsblk command.
BE CAREFUL not to use the path to the primary disk - it can overwrite the host OS.
2. After these steps, insert the SD card into the custom board and power on to boot the custom BSP.